Shipping Bikes to Ecuador

For our trip we have planned to start in Ecuador. After the trip I can say a great choice.

Now how did we get the bikes there, what were the problems, what the choices.

We decided to airfreight. To Ecuador by boat is really difficult and not cheaper when summing all up. I did quite some research on that. Here are the main reasons why we think airfreighting is better:

  • Shipping procedure super easy from home
  • Crate the bikes at home and have them picked up at your house
  • You know the exact date and time when they arrive (by boat that can be +/-2weeks)
  • Picking up the bike done in 1 day (boat: up to 1 week not unusual in Ecuador)
  • Picking up is really relaxed and no nightmare (boat: running around a huge port with papers you don’t understand and don’t know where to go next)
  • Bikes are safe

So we airfreighted. We used intime from Hamburg/Germany. A good solution. Olaf, the expert there for bike shipping helped us to get everything sorted out with very little effort from our side. We crated the bikes in boxes ourself which was the biggest trouble.

The costs:

The overall cost for shipping the bikes from Munich to Quito were:

  • Shipping F650GSDakar: 2425 Euro
  • Shipping G650GS: 2321 Euro
  • Transport Insurance (both bikes): 320 Euros
  • Pickup of the bikes from our house by truck: 275 Euros.
  • Crates for the bikes: approx 250 Euros each
  • Shipping paper in Quito: 18$
  • Customs in Quito 210$ for both bikes.

So to sum it all up: 5784 Euros for two bikes. You could have safed easily 500 Euros by taking the front wheels off, but i think it is worth to have as little to work on the bikes as possible once to get them out of customs.

Olaf told us though that this price can change a lot from year to year, so it might be cheaper or more expensive in the meantime.

Crating the bikes:

That was quite some work. Well, I am an engineer, and I was overdoing it a little bit. You may have used them as anti-tank obstacles as well, but i wanted to be on the safe side.

You cant use normal wood to crate the bikes. You either need specially treated wood (so that there are no bugs in the wood) or you use simply plywood, which is treated anyway and surely has no bugs. This means you need to make posts out of planks that you screw together though. You have to disconnect the batteries ( I secured the cables and batterie poles with plastic tape so they would not accidently re-connect with vibrations) and get the fuel out of the tanks.

Here are some pictures:

DSC03007 DSCN9551 DSCN9549

DSCN9555 dscn9558

The crates have been picked up, we got our gear together and flew to Quito. After our bike arrived (we planned it so that we would have one week without the bikes to relax and enjoy the city) we picked it up. Super simple if you know where to go (which WE didn’t but you will after you read this through.

Get the bikes out of customs:

Here is an overview of the different locations at Quito Airport.

Airport Quito

  1. Get the SOAT (see below); you may get it later  as well, but you have less trouble and discussions with the customs.
  2. Go to Cargo Area (there are signs at the roundabout)
  3. Go to your forwarder ( e.g. Iberia, Lufthansa Cargo…)
  4. You have to pay a fee there (for 2 motorbikes it was 18$ for us; cash only) and receive the shipping papers.
  5. Go to Customs
  6. 6. At the receipton there show your papers (you need passports, shipping papers, registration, SOAT)
  7. Be ready to wait … read a book
  8. They bring you to the crates and so you have to open them (bring the tools with you, there are no tools there!)
  9. They check the chassis and engine number (we always said this motorbike does not have a engine number “its the same like the chassis number”)
  10. After that be ready to wait some more (read another book)
  11. You have to pay customs (for us 210$ for both bikes) Have it cash! No ATM at customs, only at airport and you need a taxi to get there.
  12. Take your bike out. We asked the workers there if they would like the crates.
  13. You have to roll it out of customs. In the front there is a parking where you can work on the bike, but you are not allowed to work on the bike within customs.
  14. Connect batteries, fill up gas with a canister you brought.
  15. When leaving customs, the sign tells you to go left to Quito. Thats a really small steep , bad and very busy road. Take a right instead, pass the airport, and enjoy the ride into Quito on a new large and broad road.

It took us a whole day to get the bikes out, but mainly because we ran from airport to customs to cargo area because we did not know the procedure described above. Don’t expect european effectiveness though. Be patient and relax. Your trip is just about to start :-))

DSCN9587

In front of customs filling up the bikes and reconnect batteries.

DSCN9588

Get the SOAT:

Even if you have an international insurance you need to get the local insurance. It is very cheap and required. You need to have it BEFORE you get your bikes from customs. We did not know that and discussed with customs quite a bit before we were allowed to get our bikes from the airport.

Soat1soat2

It is cheap, required and (when knowing where to go to) a matter of minutes to get it. So here is how to get it:

  1. DON’T try to get it any other place than the one describet. A lot of places say they do it, but after waiting 15 minutes they find out that this is only for renewals (=locals) and that they can not help you.
  2. Go to QBE Seguros Colonial
  3. Adress: Av. Eloy Alfaro N40-270 y José Queri PBX
  4. Tel: (593)3989800 /(593)3989700
  5. Bring your passport, driving licence and registration of the bike. Also bring the paper that you get when entereing the country. It will say how long you are allowed to stay.
  6. There are different options you can choose from: 1 month, 3 months, 6 months , 1 year. We paid $6,85 for 1 month and 2 bikes
  7. The whole procedure took no longer than 10 minutes.

3P-Info Part: Carretera Austral

General Information

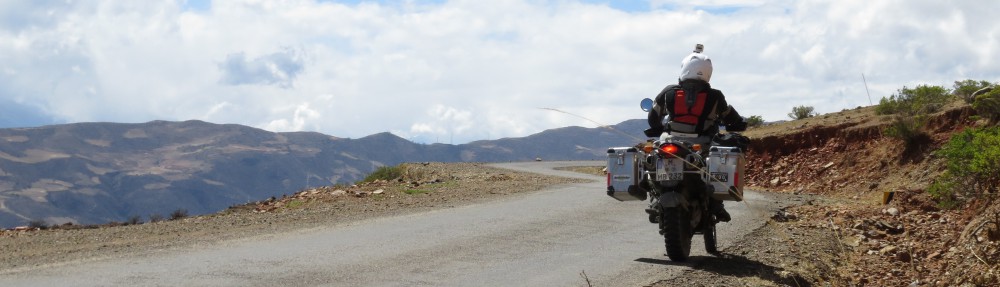
The Carretera Austral is a fantastic ride. It will bring you to one of the most beautiful places in South America. You have to bring a little bit of time with you though and be ready for some delay on the road. Another thing not to forget is proper rain gear. You will most likely see a lot of rain and heavy winds here.

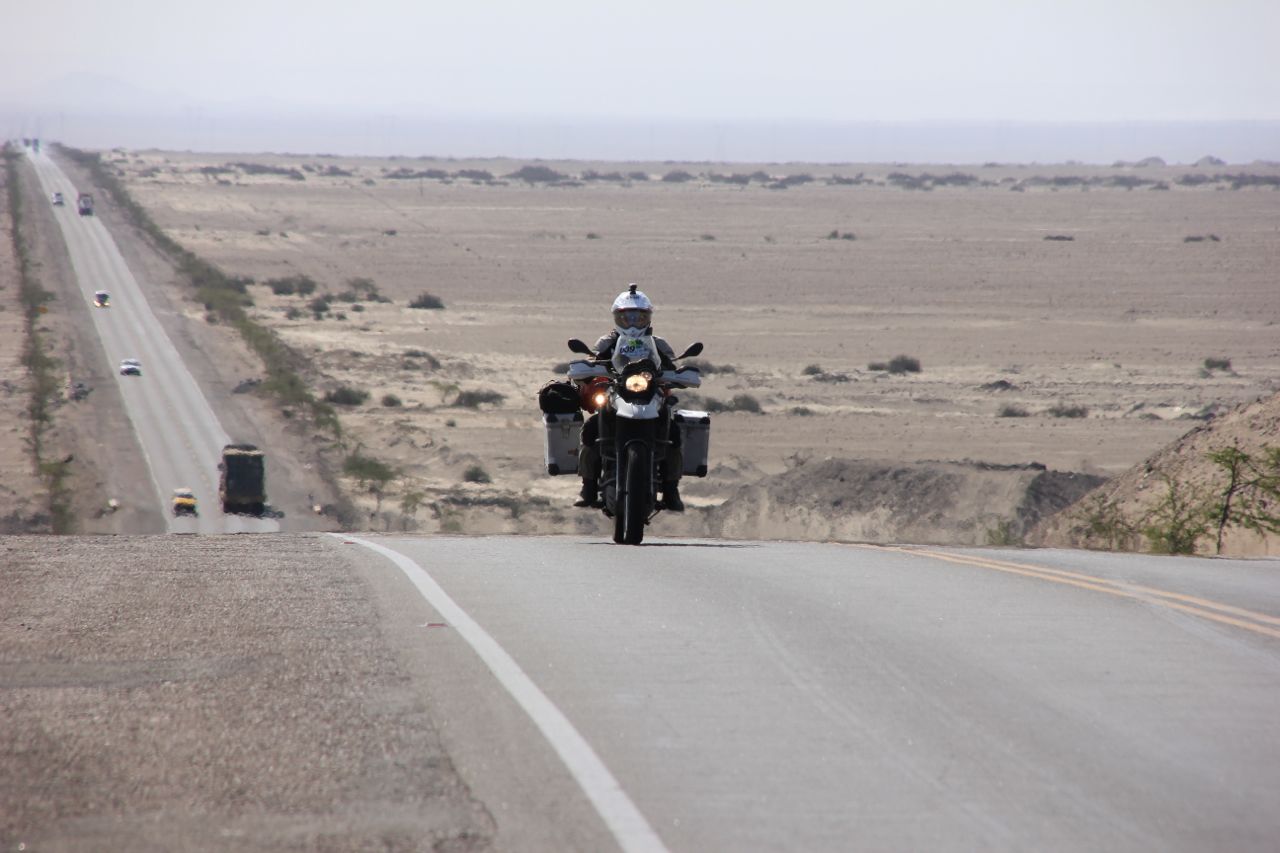
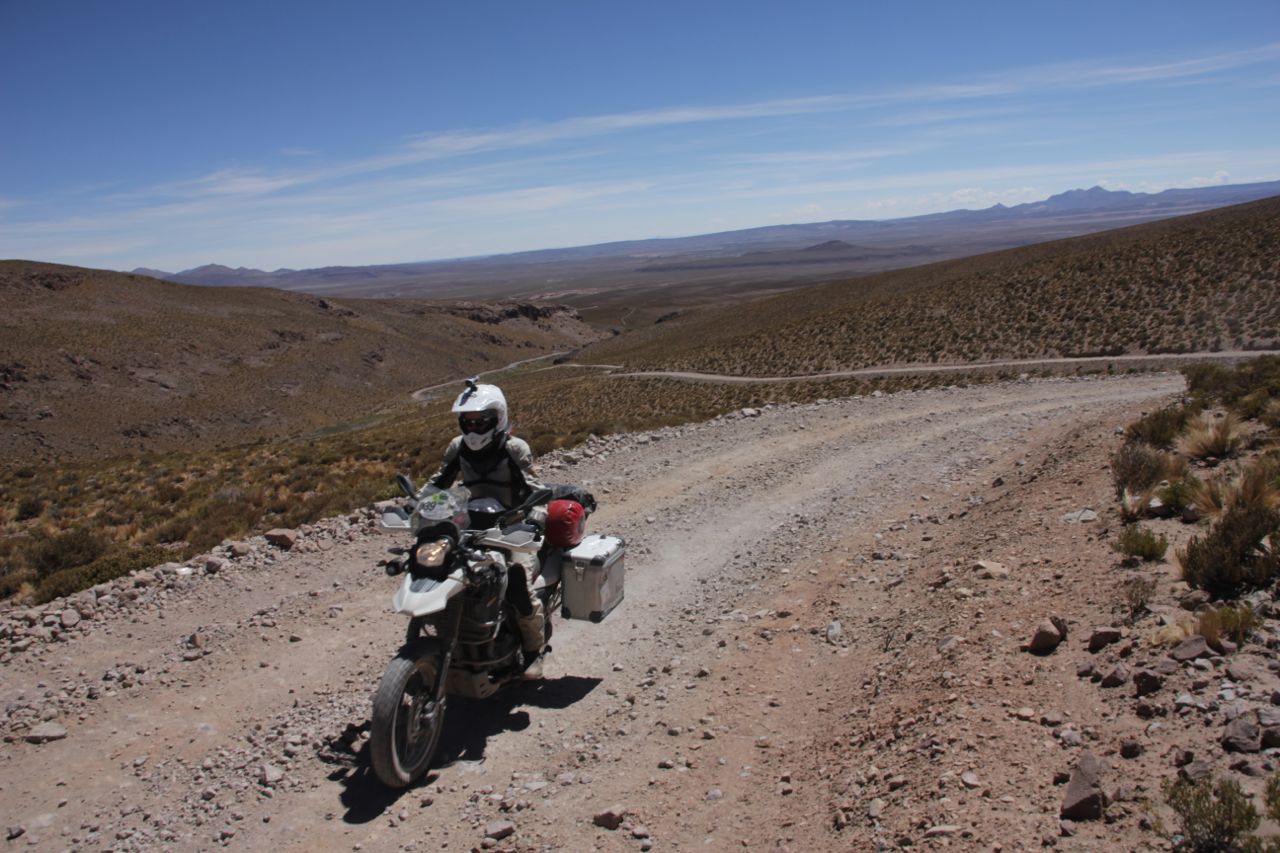
There is lots of construction going on to turn this road from a dirt road into a good tarmac road. In many parts this has already been achieved, most of the road is still gravel. The majority of the gravel parts are in very good condition though. There are many people on regular bikes (e.g. choppers) on the road so it is not as bad as some people say. The construction sites are pretty bumpy though, so you have to take your time.

The Carretera Austral is a pretty young road. It was only in the seventies when the southern part of Chile was connected with a road. Chiles dictator Pinochet ordered to build the road to get easier access to it. Originally the roads name therefore was Carretera General Pinochet and was only changed later into the actual name Carretera Austral.

There is no lack of fuel here. You do not need more than 200km range on the Aarretera Austral.

There are plenty of gas stations on the Carretera Austral, here is an overview of the Copec ones.

There are plenty of gas stations on the Carretera Austral, here is an overview of the Copec ones. There is a gas station between Coyhaique and Cochrane, it is just not a COPEC one.

But you need extra cash, since ATM are only available in a few towns (mainly in Coyhaique).

In the whole area there are lots of salmon farms. So if you like fish: this is where you probably get the best salmon.


Background:

We only rode the part from Hornopiren to LaJunta on motorbikes.

The part from LaJunta to Puyuhuapi and the most southern part from Cochrane to Villa O’Higgins I only know from describtion of other motorbikers which I interviewed in detail.

The part from Puyuhuapi to Cochrane we did on a 4×4 which we rented in Coyhaique.

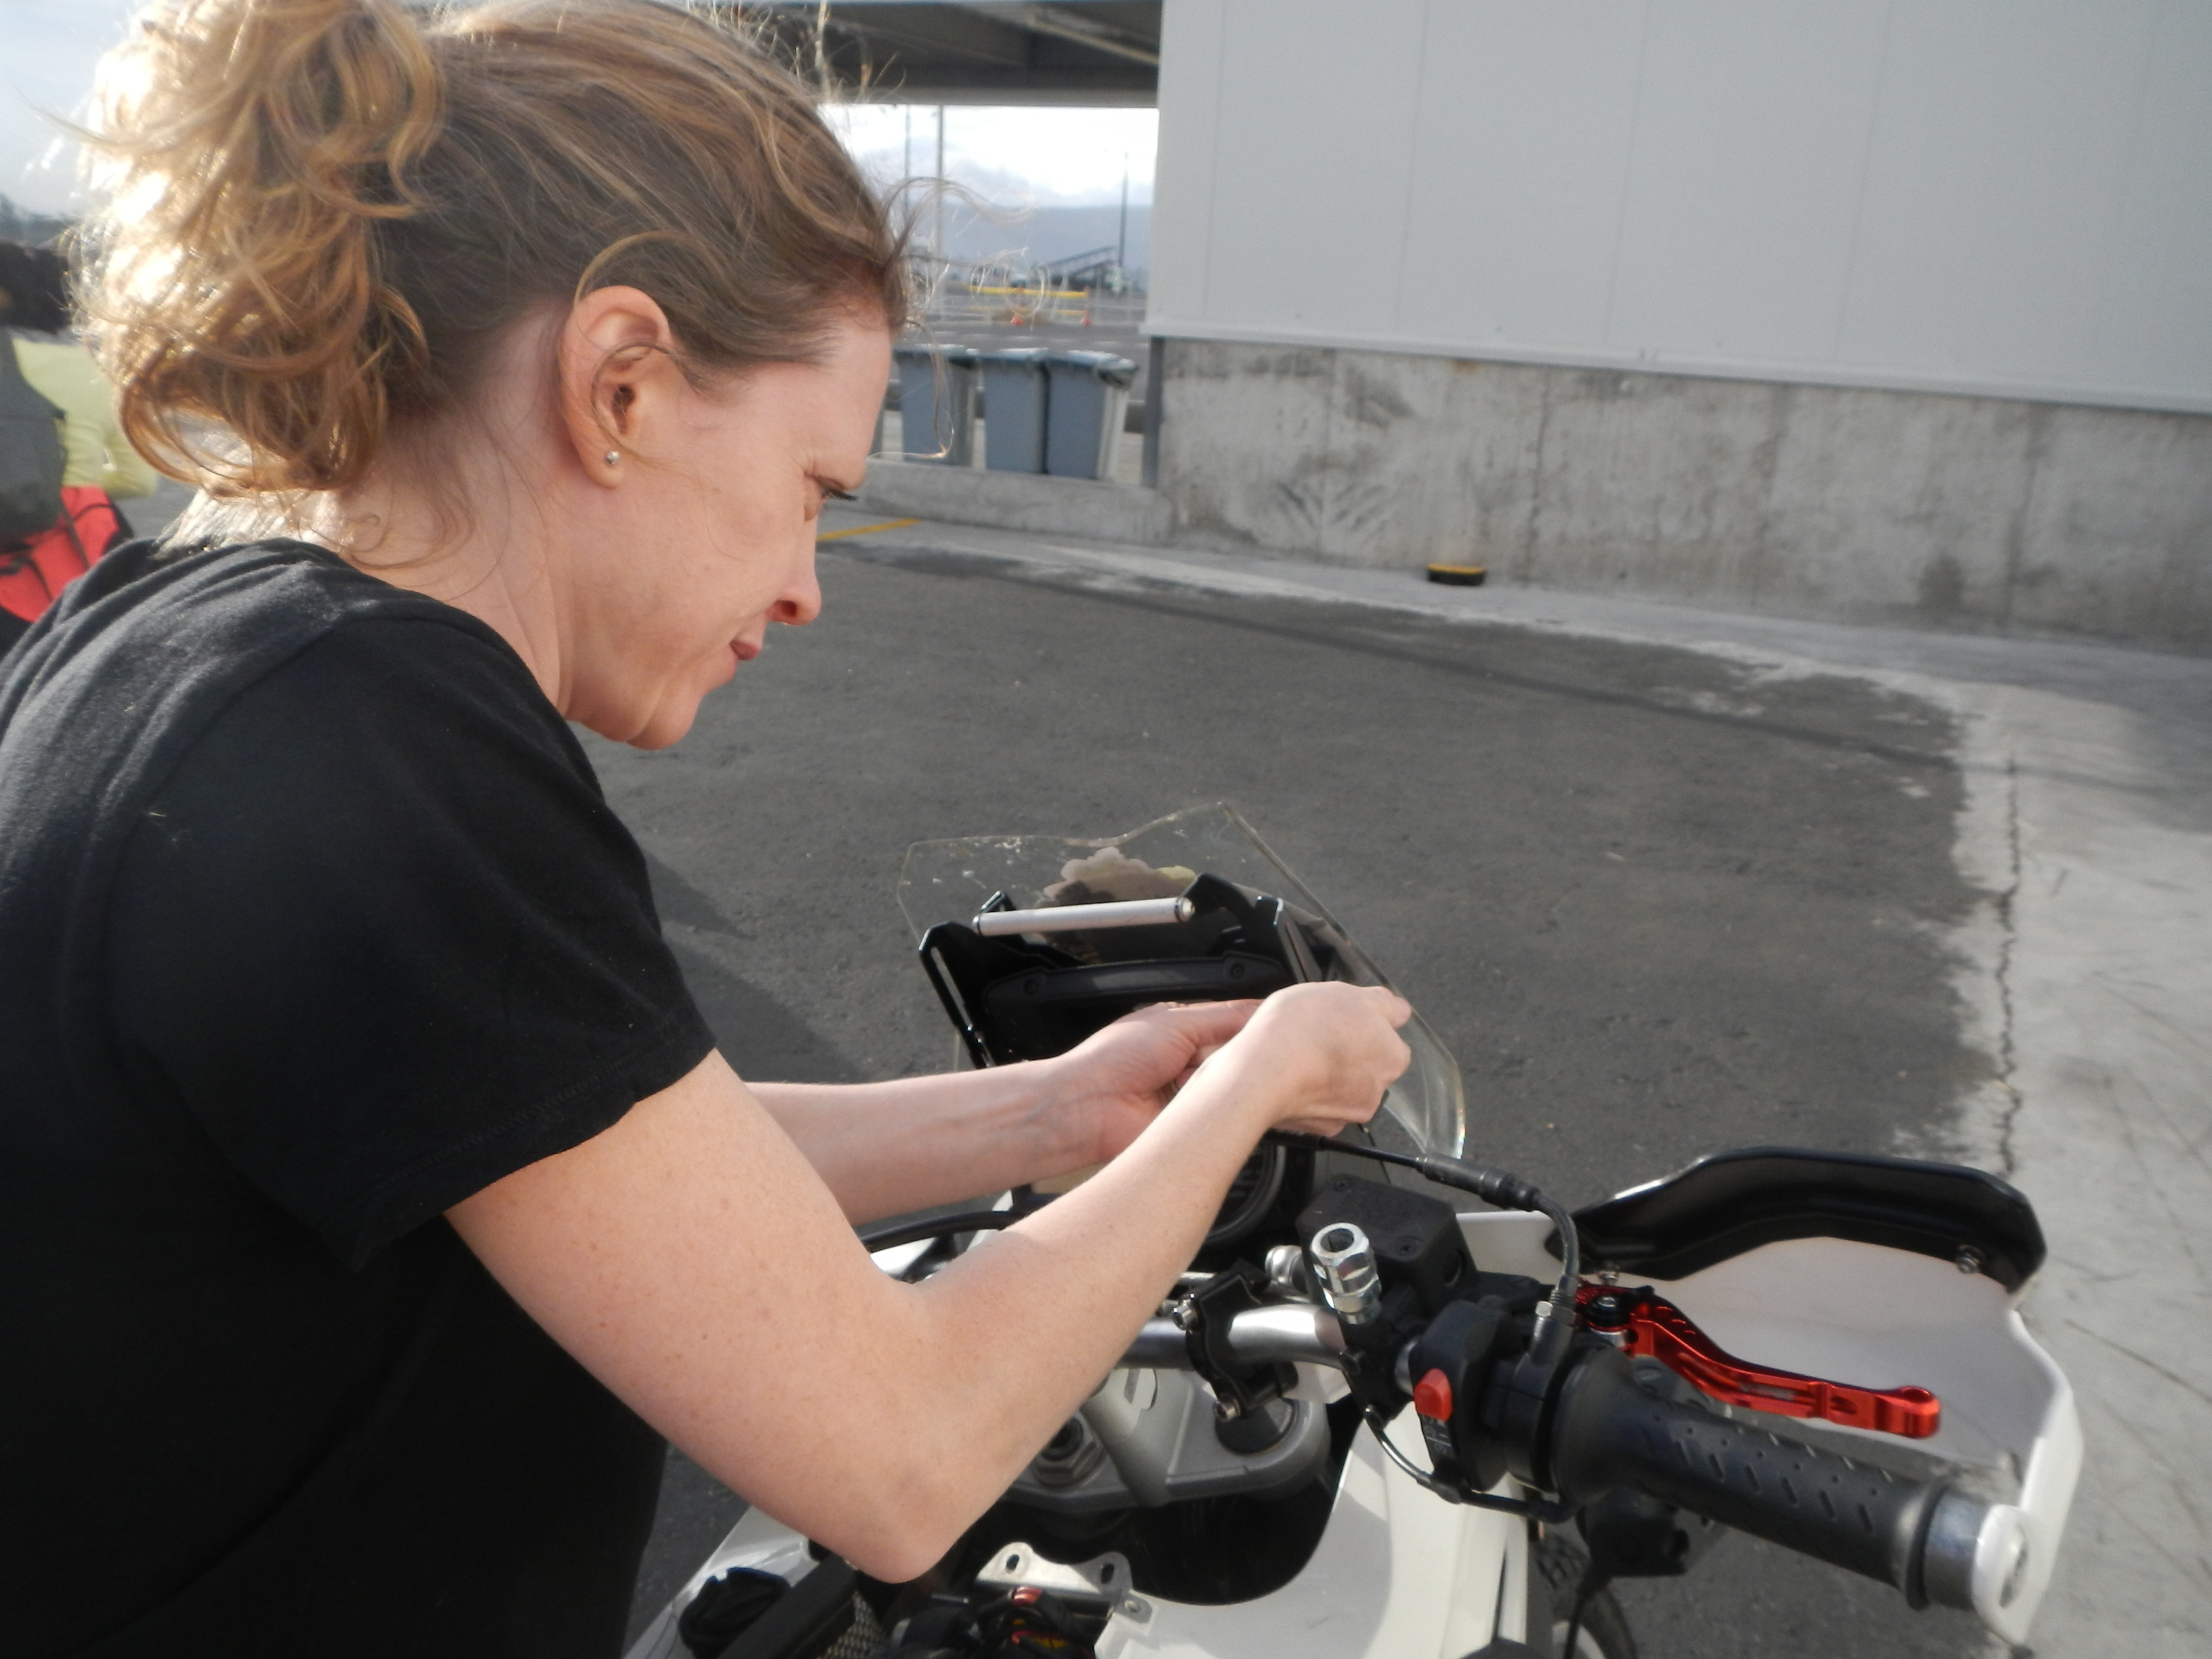
Christy had an accident and broke her foot when we wanted to bypass Puyuhuapi since there was a larger landslide that completely blocked the road in December.


Getting there; the ferries:

The Carretera Austral is not connected to the rest of the Chilean road system. It is reached by the use of ferries.

There is a ferry going from the island of Chiloa. I have not found an actual timetable for it though. As far as I know they run once a week.

The main connection is by use of a total of three ferries.

You start the ferry connection in La Arena, 45km south of Puerto Montt. The ferries go every day every 45 minutes from 7:15am till 8:45pm. The duration is approx. 45minutes.

Motorbikes usually do not need a reservation, but of course you can do that if you want to be sure.

The three ferries

The three ferries

This ferry will bring you to a peninsula from which you continue on a partly paved road to Hornopiren.

In Hornopiren there are a couple of hostels, hotels and cabanas. The town has a nice flair and is nicely located at the end of a fjord.

From here Ferry two brings you from Hornopiren to Leptepu where you take a 10km dirt road to the next ferry. The loads of the two ferries are always connected so do not make a longer stop in between (thats not advisable anyway, since the road is terrible dusty). You will arrive at the third ferry after ten kilometers and you will be loaded on the third ferry which will bring you from fjord largo to Caleta Gonzalo.

The second ferry from Hornopiren leaves during highseason at 10am and at 12am. It takes approx. 3,5 hours.

After the short ride to ferry 3 you will immediatly boarded there.

The prices for ferry 2 and ferry 3 are connected, so you only pay on one of the two ferries. Ferry 3 is a 45 minutes crossing of a fjord.

You find the detailed ferry schedule, high- and lowseason prices more information here: http://www.taustral.cl

The homepage is in most parts spanish only.

The ferry rides are really nice. Since the bays are pretty protected there are no high waves. The ferries are all ex-marine landing boats, so they only have one ramp (meaning first-in last-out, and that means you have to turn your motorbike around for disembarking).

From disembarking of ferry 3 to Chaiten it is about 60km.

Take your time for this part. It leads through a fantastic national park with lots of green, nice views and ground zero of a desaster (the volcano Chaiten blew off with little warning in 2008).

There are a couple of campsites along the way and they are really nice, so if you own a tent, this is great camping here.

Chaiten has a couple of hostels and restaurants.


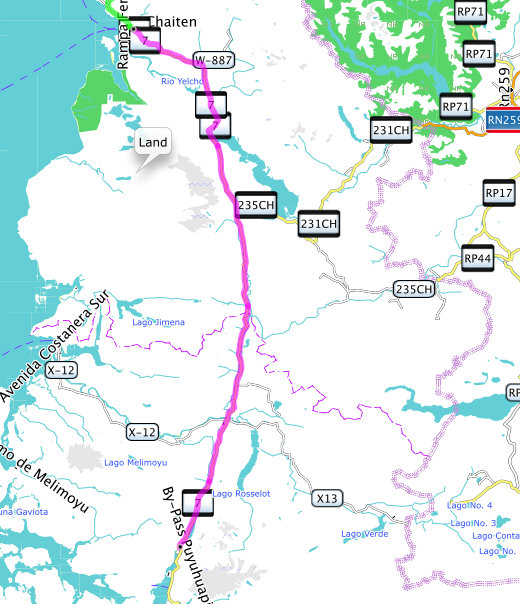
Chaiten to Puyuhuapi (187km)

Chaiten - Pyuhuapi

Chaiten – Pyuhuapi


The road from Chaiten to Puyuhuapi is again very nice. It starts as a well paved road and turns into a good gravel road after some 30km.

Between LaJunta and Puyuhuapi there is some construction going on. The road is closed between 1pm and 5pm, so make sure you are there before or after or take a book to read.

(Of course this construction is only temporarily, but from what we understood it will take some time, so check HU or ADV for update info on this).

In Puyuhuapi you will find many nice hostels, hotels and restaurants.

See our trip of this part here.

Puyuhuapi – Coyhaique (233km)

Puyuhuapi - Coyhaique

Puyuhuapi – Coyhaique


After Puyuhuapi make sure you take your time to go the Colgante glacier lookout. It is easily accesable and a great view. A few kilomters after the glacier there is a construction site again. The road is blocked from 1pm to 5pm (again check this for updates, search HU or ADV or ask the police, they know).

After an impressive and bumpy construction of approx. 5km the road gets better even though it is pretty bumpy with lots of potholes. You leave the fjord now. Enjoy the nature around you, it is beautiful.

12km after leaving the fjord you will hit a steep mountain pass. The road up is a bit bumpy in the curves. On the way down you will find the last 3 kilometers to be a construction site. This is probably the worst part of the whole Carretera Austral. Take it easy here.

You will find deep gravel with large rocks, all pretty steep and partly slippery. Go slow (unless you really know what you are doing in these conditions). It is only for a short distance.

Soon after the mountain pass the gravel road turns into a perfect tarmac road.

The road leads all the way to Puerto Aysen and from there to Coyhaique. There is a direct road shortcutting the road to Puerto Aysen. This shortcut is a very good gravel road.

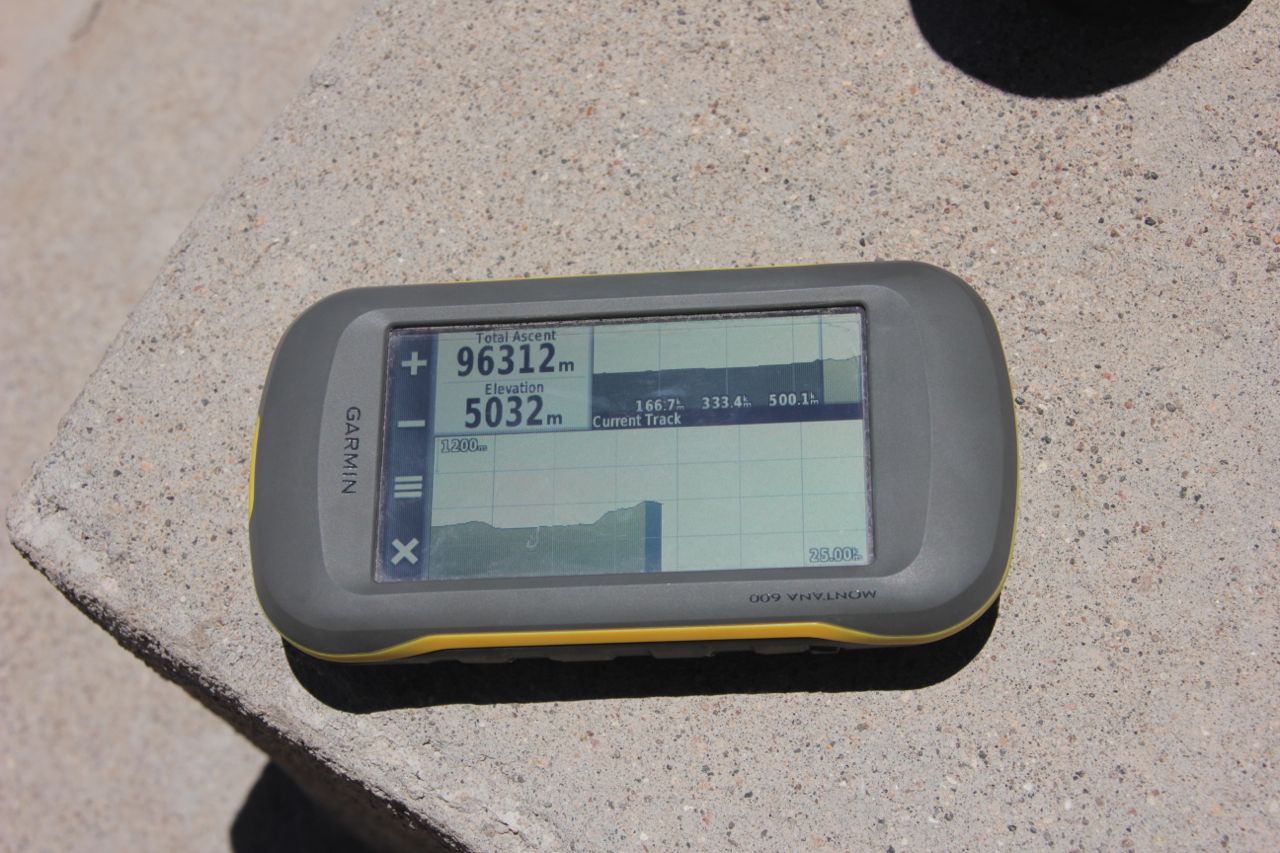
Coyhaique is the biggest town on the Carretera Austral. It has lots of accomodation and a couple of good restaurants. Here is the only place where you can get securely cash on the Carretera Austral.

There is a surprisingly good hospital. They have good doctors and a very good x-ray machine (that’s what a swiss doctor said when he looked at Christy’s x-rays a few days later).

See our travel of this part here.

Coyhaique – Puerto Rio Tranquillo (220km)

Coyhaique - Puerto Rio Tranquillo

Coyhaique – Puerto Rio Tranquillo


The road is paved all the way to Cerro Castillo (100km). Cerro Castillo is a little town with some a restaurant and some simple hostels. You have a great view on the fantastic mountain that gives the name to the little town. The road till here is stunning and it is even getting better.

After Cerro Castillo the road turns into a gravel road. It is pretty good. Most difficult part in terms of riding is to keep the eyes on the road: the surrounding is one of the best areas I have seen in South America. The rivers and lakes have incredible colors, the nature is changing from really rich to some really brown parts.

The winds can be really strong here, so be ready to swerve over the road a little bit. If you feel exhausted think of the daredevils who ride this on bicycles. That will cheer you up!

In Rio Tranquillo there are a couple of restaurants and accommodation and a gas station. There are boat tours to the marble caves. In the morning the sun is shining into the caves, but you have to be lucky to have sun at all. The boat ride is pretty bumpy and you can get pretty wet (especially at the back of the boat).

One of the highlights on my entire SA trip was the boat trip to Laguna San Rafael. It is very pricy (around 200$ per person).

I have seen calving glaciers before (Iceland) and after (Perito Moreno). But this trip was fantastic and I highly recommend it to everybody. You need to ride yourself to the valley of Exploradores where the tour operator picks you up. The ride there itself is fantastic, so if you do not want to do the boat trip, at least have a little tour into the valley. It is really nice.

See our trip of this part here (1st part) and here (2nd part).

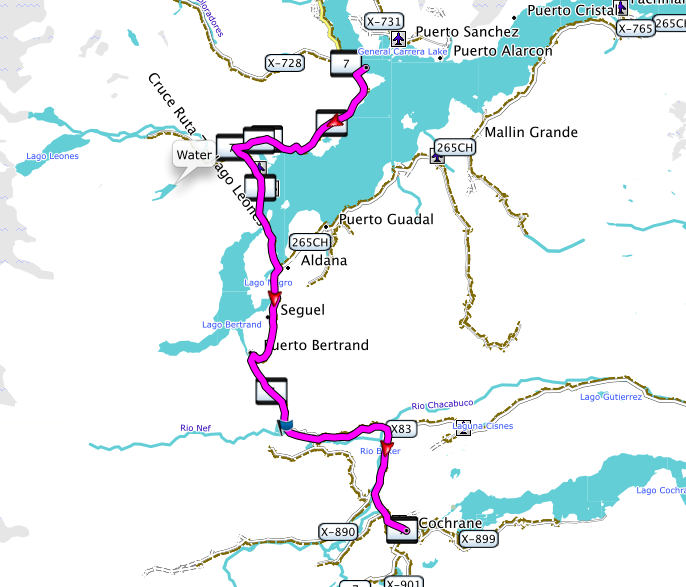
Puerto Rio Tranquillo – Cochrane (115km)


Rio Tranquillo - Cochrane

Rio Tranquillo – Cochrane

The road goes along the fantastic lake of General Carrera for some time. The color of the lake is fantastic and the road offers some nice views on it before it follows the Rio Baker south. The river cut a deep canyon into the mountains and so the road goes up and down following the river. Again the road is pretty good and only very few areas with a little bit deeper gravel are on the road. I general the road is in really good condition. It is getting narrower though.

Don’t miss the little hike to the junction of Rio Baker and Rio Nef (approx. here : S47° 06.902′ W72° 46.406′). There is a really nice waterfall there. A great place to do a little walk (it is only 15 minutes) and rest at the waterfall. The color of the Rio Baker is really strange and combines with the grey color of Rio Nef.

In Cochrane again you find nice accomodation, restaurants and a bank (even though I was not able to get money out of the ATM there).

See our trip experience of this part here (San Rafael) and here (road to Cochrane)

Cochrane – Villa o’Higgins

We did not do this part of the road, but I was told the road condition are even getting better. You have to ride this part of the track back though, since there is no way for motorbikers to continue to Argentina.

Cyclists can take a ferry and do a hike (pushing the bike) on a small, narrow trail. They take another ferry and end up close to Fitz Roy in Argentina. For motorbikers this does not seem to be an option.


Getting out:

There are multiple passes to or from Argentina:

From north to south:

  1. Futaleufu to Esquel (Ruta40): we did the road till Futaleufu (and from there we went back to the Carretera Austral). It is very nice and you end up in Esquel in Argentina, where you will also find multiple gas stations. Futaleufu is mainly known for massive class 5 whitewater rafting.
  1. Alton Palena – Carrenleufu – Tecka (Ruta40): (just south of Futaleufu) we did this after the Carretera Austral was blocked. The bordercrossing was simple and fast, the landscape on the Argentinian side is stunning. The road was mainly in good condition. There is a simple campsite in Tecka and the gasstation there has accomodation (4 appartments) which are nice and clean. In Tecka it gets pretty windy.
  1. La Junta – Lago Verde – Jose San Martin: we heard it is possible to cross there. We met one motorbiker who tried, but the rode was destroyed there because of a landslide (you may want to check with locals about the up-to-date road conditions.
  1. Coyhaique – Rio Mayo (Ruta40): we entered here from Argentina to Chile. On the way Christy had her accident. The road is quite difficult: deep gravel of large rocks. You either have to go very slow or go very fast. We both had a couple of “saves” before Christy couldn’t save it at one point. (see here). Rather difficult and not recommended.There are a few hotels in Rio Mayo, a gas station (only takes cash), a bank (we did not get any money though, thats an issue in Argentina and small towns in general).
  1. Puerto Ibanez – Chile Chico – Perito Moreno (Ruta 40): we only heared about this possibilty: many people use it, it is all paved, you can take a ferry to Chile Chico. Coming from north you miss nice parts of the Carretera Austral though
  1. Cochrane – Paso Roballos – Bajo Caracoles (Ruta40): this is a road leading through the property of the Tompkins. The “future National Park Patagonia”. A great landscape, many Guanacos, a nice visitor center of the NP already in place (worth a stop for a coffee). The road is stunning, but a bit bumpy at times, never difficult though. So just take your time. You can also go from a junction up north to Perito Moreno (must be nice, we didn’t see it). Anyway, a great ride. Bajo Caracoles has accomodation in the gasstation there. North of there there is the Cueva de los manos (see some pix here), a great site to visit. On the Ruta 40 you will have heavy winds. Read about our trip of this part here.

Equipment: The bikes …BMW 650 GS

We both use BMW 650GS. Christy a 2011 G650GS and myself a F 650GS Dakar from 2005.

Our bikes: a 2005 F650GS Dakar (front) and a 2011 G650GS

Our bikes: a 2005 F650GS Dakar (front) and a 2011 G650GS

I rode the F 650 Dakar model for more than 6 years now (earlier a 2003 Dakar model) and I am pretty very happy with this bike.

It is just a “no-drama” bike. It works. Always.

In the following I put down my experience with this bike in case you are considering it as a travel bike.

For travelling this is an excellent choice for a couple of reasons:

  • good engine and comfortable for long rides
  • consumption and range
  • no problem with low octane fuel
  • no problem with high altitude
  • no problem with bad quality gas
  • no engine issues .
  • pretty low (the G650GS that is, not the Dakar!)
  • Offroad capabilities

The downsides:

  • bearing of steering
  • bolts of G650GS (model since 2011)
  • splash guard F650GS (only 2005model)
  • rear mirror (2000-2006 model)
  • stand Dakar (all years)

 Good engine

The engine has enough power for travelling; I never had the feeling that I would need more power. But it has a very good culture, no bad vibrations. The seat is by standard quite comfortable and good for long rides. For offroading it is better to put the handlebar a little bit higher though.

Long stretches no problem

Long stretches no problem

 No Power loss

Even in the high Andes it was enough power, even though of course there is a noticeable power loss on altitudes over 4000m.

Even at elevation over 5000m we never had any issues

Even at elevation over 5000m we never had any issues

Consumption and range

Consumption is sensational: during most of our travel the consumption was as low as 4l/100km (70miles per gallon). On major roads when travelling over 100km/h consumption goes up to approx. 5l/100km.

The Dakar can cover min 400km, the G650GS has only a 14L tank so it covers approx. 350km.

We only had two times (southern Bolivia and southern Argentina) where we needed more than this and we simply bought 2 canisters with 4L each and that covered 500km.

The canisters we simply attached to the passengers footrests with two straps. That worked perfectly fine even with the 500km gravel we covered in southern Bolivia.

No Bad gas issues

We used gas with octanes as low as 80 and we were advised to filter the gas in Bolivia before filling it in our tanks, which we never did. We never had any issues with this though.

No engine issues

I had a 2003 F650 Dakar with 65000km on the clock. My actual bike is a 2005 model with now 35000km and Christys bike has 34000km. We had absolutely no issue with the engine ever.

Height

The G650GS is ok for riders who are not that big. My girlfriend is 1,65m tall and she can handle the bike pretty well. She gets her feet down (not flat though) and she managed to handle the bike in pretty bumpy road condition, even though she was not an experienced rider at the start of this trip.

For shorter persons the bike is perfectly fine. The Dakar version is quite high though, so you should be at least 1,70m or taller.

Christy is 1,65m, learned to ride not a year before the trip and had no issues handling the bike.

Christy is 1,65m, learned to ride not a year before the trip and had no issues handling the bike.

Offroad capabilities

We did some of the hardest routes you can do as a traveller in south america and both bikes had proofed to be good enough. You do NOT need a Dakar version. The G650GS will meet your needs for such a travel.

The Dakar version is good for even some tough terrain, but you most likely do not approach that with heavy travel luggage.

Most important: it is not too heavy. I can get my bike up again after I fell (off road that happens, sooner or later). I would not like to fight with a 300kg monster…

Christy in action on the G650GS.

Christy in action on the G650GS.

 Issues with the bikes:

There are some downsides to the bike though:

Bearing of the steering

Seems to be a problem: I had to change it on both Dakars that I had after long straight stretches. It is nothing that you need to address immediately during the travel though. You have enough time to change it when it appears. So it won’t stop you in your travels, but you might want to check before starting on a longer trip.

Bolts on the G650GS

There has been a quality drop from the 2000-2006 models to the newer G650 (2011 an later) models. We had severe problems with multiple bolts on Christy 2011 bike. Some heads were bad, so that you couldn’t use the standard tools (they were not “damaged” by wrong use of a tool, but the original shape of the Torx was not deep enough, I don’t even understand how they fixed them during assembly).

Other screws (in total 5) had seized up so that we could not open them without damaging the thread. Before you go on a journey with one of the newer models check the bolts. It is a real pain to deal with this during the travels.

Splashguard 2005 model

This is a problem only occurring on the 2005/2006 model of the F 650 Dakar.

They have changed the windshield from the 2003 model so that when it rains, you get all the dirty water splashing up from the front wheel nicely sprayed on your visor. Really fantastic, I don’t know what engineering was thinking here. Anyway I fixed that simply with a piece of a plastic bottle and some tape. Works perfectly fine.

IMG_1941 copy

Rear mirror

I lost both mirrors during my travel on my Dakar. They stick out pretty far and when you fall, the chances are pretty good that you are loosing a mirror. In my case that was a simple fall over of the bike due to heavy wind.

Get them changed for some more offroad compatible ones before you travel, you need the mirror when you hit some lousy traffic as e.g. Lima.

Great replacement for my original mirror. I got it for 3$ . Cheap is best...

Great replacement for my original mirror. I got it for 3$ . Cheap is best…

Stand Dakar

The Dakar stands at an really frightening angle. The stand is simply too short.

With the road being a little bit uneven in the wrong direction the bike simply falls over when heavy loaded. Same happens with soft ground. Wunderlich has a nice add-on part that makes the stand larger so it wouldn’t sink in as much AND is approx. 15mm thick, so the bike stands more upright.

Make sure to glue in the screws as I have lost that handy little part during my trip.

The Dakar stands at an scary angle on the side stand. Good idea to have that improved...

The Dakar stands at an scary angle on the side stand. Good idea to have that improved…

Rear splash guard F-650GS 

The rear splash guard the F650 has attached originally doesn’t last. On both my Dakars it came off eventually, leaving a plastic part flapping around. I just ripped the rest away, just leaving the guard for the chain on the bike. You can do this advance or just let it happen during the travel. It might get caught in the chain or the tire somehow, so i would just take it off in advance.

Before...

Before…

After...

After…


Comparison G650 vs. Dakar version

Both bikes are good for travelling.

The Dakar version offers a better suspension if you want to go high speed offroad. I liked to do that sometimes, but this is nothing that is a necessity for a trip, more a fun thing to do if you know what you are doing.

Other than that: the G650 doesn’t limit you in terms of where you can get it to.

The G650GS has 3L less gas on board. That is no problem, as the only time we needed to enlarge the range was in southern Bolivia and southern Argentina (a 4L canister did the trick). In Ecuador, Peru, Chile you will have absolutely no fuel issue with a range more than 200km.

They are both good bikes for travelling

They are both good bikes for travelling

There are two thoughts that I think might make the G650 even a better bike for South America:

  1. For riders not experienced with sand or deep gravel: a wider front tire helps you in these conditions. You can’t lower air pressure, since you may hit hard rocks, so the 19″wheel of the G650 has an advantage over the 21″wheel of the Dakar due to the wider tire.
  1. The Dakar is higher, and that makes it more vulnerable to side wind. You will hit a lot of wind from the side in South America (along the coast of Peru and of course in Patagonia). I had the feeling that Christy on the G650 was not swerving as badly as I was on the Dakar when we had side wind. That might be because the bike is higher. Another effect on this might be the smaller front wheel of the G650. It is rotating at higher speed and that might stabilize the bike a bit more (I haven’t really calculated that through, so corrections on this thought are highly appreciated).

3P-Info Part: Salar de Uyuni

The Salar de Uyuni is one of the most amazing places I have ever visited.

Crossing it on a motorbike is priceless. Don’t miss it.

Get there:

To get to Uyuni from LaPaz there are basically two options:

1. direct road from Challapata to Uyuni

2. continue in Challapata on the Ruta 1 to Potosi and then go west to Uyuni.

The first option is a really bad road. Lots of cur rogations, sandy parts, lots of construction. They are building a new road, so in a few months this might be a good option. But certainly till middle of 2015 this is a very bad road for 160km. But it is very beautiful and there a nice spots to pitch your tent on the way (eg. rock formations few km before Rio Mulatos).

The second option is all paved and in good conditions. Potosi seems to be a nice city with a silver mine. So this is by far the easier route.

It case in rains:

In case it had rained, it is strongly recommended (by a lot of people, including local guides and international motorbike guides) to not enter on your own motorbike. That is especially the case for modern motorbikes with a lot of electronic equipment. The water splashes everywhere and may cause serious problems. After a day, or a week or a month…

When the lake is whet (in ourcaseonly the first few hundret meters) the salt really gets everywhere.

Some people had to leave their motorbike there as the electrics got so badly torn up, that it was not repairable. Of course you can also go with your own bike if it is wet, if you are lucky you won’t have any problems.

You can rent motorbikes though (small Honda 400ccm which are big fun or more powerful DR650).

You can rent them at MTB: http://www.motorcycletoursuyuni.com

They only rent including guide at 200$ per day. Thats quite pricy, but totally worth it. The alternative would be to take one of the many 4×4 organised tours. That is a lot cheaper, but you miss the feeling of riding a motorbike on the salar, which is fantastic.

If the Salar is dry it is safe to go on your own bike

Ride into the void:

There are only few places where you can enter the Salar.

Don’t enter anywhere else and only use the tracks from the 4×4. Off the tracks the surface can be very soft so that you may sink your bike and need a 4×4 to pull it out.

The eastern entrance is in Colchani at the road from Chalapata to Uyuni at approx. 20km north of Uyuni (S20° 17.876′ W66° 56.130′). You can’t miss it. There are 2 salt hotels at the entrance. We haven’t stayed there, but people we met said it was interesting (plus you can see the sunset over the salar there).

Once you are on the Salar you can go wherever you want.

Once in the while little holes (up to 50cm diameter) offer a view into the world of salt crystals underneath (the locals call them “Ojos”). They are no danger and you can go and have a look.

There is an island where all the 4×4 organized tours go to (S20° 14.498′ W67° 37.671′): Isla Incahuasi (formerly Isla Pescado). It has a little hill and offers a fantastic view. Only enter the island from the northeastern end (where you will see some huts and during the day dozens of 4×4, as the rest of the surroundings of the islands may have a thin salt crust).

It is great fun to ride the bike on the Salar. It is not slippery at all.

After the visit make sure to clean your bike at one of the many washing places in town.

3P – Info Part: Southwest Bolivia – Laguna Colorada

Uyuni to San Pedro de Atacama

Riding north to south it seems a logical route to go from Uyuni to San Pedro de Atacama in Chile. It is fantastic ride, don’t miss it.

Here are some pictures from our trip.

Below there is some information about the ride. But first let me give you some general information:

The internet is full of reports about this area. A lot of people who did the ride had a hard time and that’s what they write. Don’t hesitate of doing it though.

With the right preparation everybody can do it on every bike (maybe not a Goldwing or a racebike).

Update: after I got an email of Bob, a great fellow, aged 74, who asked me about some details I would like to add one more sentence here: if you are not an experienced off roader, you have to be prepared to pick up your bike a few times. Little falls just may happen. At altitude of constantly over 4000m (13000ft) and at times over 5000m (16000ft) that might be strenuous. Take your time, take it easy and you are fine though.

We did it on a F650GS Dakar and a G650GS. We had Heidenau tyres which were quite low on profile.

My girlfriend made her license not a year before the trip. She had little experience before the trip and one long weekend offroading with a little Beta200. So you don’t need to be an expert at all. Just prepare and take it easy.

What you need is:

  • Fuel for 500km (we simply bought two 5L fuel cans that we strapped on the bike)
  • Enough water (we had 4L each)
  • Some money for the overnight stays (be reminded that you enter a national park where you have to pay 150Bs entrance).
  • Some snacks to keep you going during the day
  • GPS maps of the area (OSM has a good map which turned out to be very precise in this area). (The paper maps from Reise-Know-How are crap for this part of the journey).

Take your time. We made it in 3 days, which was quite relaxing.

Don’t be worried if something happens: There are many 4×4 running these roads as this is a very common touristic thing to do in organized tours (see below), so there is always help if needed. People will stop when you give them a sign. You can also ask them if you are unsure about directions. Just stop an wait a little bit. There will be someone coming.

The most4x4 tours make the loop: Uyuni-Salar-San Juan-Laguna Colorada- Laguna Verde- Villa Mar-San Cristobal-uyuni(3 days).

The 3 options:

There are basically 3 ways from Uyuni to San Pedro de Atacama.

  1. The Lagoon route via San Juan
  2. The route via San Cristobal
  3. The route via Tupiza
  1. The lagoon route is the by far most sandy one. It has a stretch of more than 60km (depending on the conditions up to 90km) sand. You pass a lot of lagoons and this is the route the 4×4 take from Uyuni via San Juan to the Laguna colorado all along the Chile-Bolivia border. You also pass the famous Arbol de Piedra, a rock formation that looks like a tree. For motorbikers this is the most strengous version.
  1. San cristobal route: This route is the one we took. It seems to be the easiest one. The first bit is in very good condition (almost like a paved road) and there are only short sandy bits of road (max. 1km). Most parts of the road are rocky and easy to ride. You pass a nice lagoon and some incredible rock formations that are certainly as spectacular as the Arbol de piedra. You can devide the road in 3 days or do it in 2 days (but that would be pretty hard or you are experianced off roader).
  1. The route via Tupiza is also pretty sandy, not as much as the Lagoon route (I was told by a 4×4 tourguide). It brings you to places where Butch Cassidy and Sundance Kid lived and died. This route I have the least information on, but for people who are experianced offroaders and who want to spend some more remote time this would be the route. There are not as many 4×4 tours on this road.

Info Laguna Colorada

Flamingos, thousands.

Flamingos, thousands.

Route 1 and 2 are meeting at the Laguna Colarada.

There is a camp there (S22° 10.260′ W67° 49.049′) where all the 4×4 groups stay. Simple rooms usually as dorms, but you can also rent a complete dorm for yourself if you want to have some privacy.

There is another one (calls himself a hotel, but is not better than the camp(Info from a 4×4 tour guide) south of the Laguna Colorada (S22° 15.802′ W67° 48.961′). Here you can also buy water and snacks.

Close to the camp there is a lookout (S22° 10.222′ W67° 48.279′).

DO NOT MISS THAT. If you are doing route 2 go around the laguna (or take a short cut on the north side of the laguna) and go there. All the tourists go there so the place gets crowdie at times, but this place is incredible. The colors of the lagunas are in general better in the afternoon, as the strong afternoon winds stir up the water and the bacteria in it which create the great color

 Detailed describtion of Route 2:

Uyuni – San Cristobal – Villa Mar – Laguna Colorada – Camp Laguna Colorada – Geysers – Laguna Verde

The road leaves Uyuni south west direction. You pass a gas station (S20° 28.174′ W66° 49.200′) and leaving the town. The road is in very good condition. You can easily go 80km/h. In San Cristobal there is a gas station, but it does not always have fuel. So don’t count on it. But if you have very little reserve, you can try to get some fuel here.

There are also some shops where you can get water.

Shortly after the town of Villa Alota take a left (at S21° 23.974′ W67° 36.893′).

The road gets rougher now. A little bit of dust and sand is on the rocky road, so take it easy. Shortly after the turn off there is a water crossing. It is approximately 40cm deep and rocky. So you may get your feet wet. They are building a bridge there, so end of 2014 you may have a less adventurous crossing there.

The road gets up the mountain and soon you will see amazing rock formation right next to the road on your right hand side (S21° 32.155′ W67° 34.742′). If you plan to camp, this is an excellent place.

IMG_4103 copy

The following part of the road is a bit sandy at parts, but never long stretches. And the sand is never really deep. So you can “powerwalk” through the sandy parts.

In Villa Mar there are a couple of simple B&B. The tours stop here on the way home from the Laguna Verde. We stayed here in a simple B&B at the end of the town and had a great meal in the evening and a good (simple) breakfast. You can also buy water here.

Shortly after Villa Mar you have to turn off the main road. The turn off is here (S21° 46.208′ W67° 27.818′).

IMG_4147 copy

Turn to the right and follow up the hills into a beautiful little valley which I like to call “Lama paradise”. If you get there, you know why. The road gets pretty rocky here.

After a few kilometers you arrive at the first lagoon (Laguna Capina). You have a nice view on it. So make a break and enjoy the view.

A first lagoon

A first lagoon

After you have the lagoon behind you a pretty sandy strech begins. It is pretty much the worst part and it will bring you into the national park. There is a guy living here in a small hut. You have to pay him some money and you get a ticket. Don’t loose it. It will be checked on the way out (some told us, we were not checked).

Shortly after the entrance of the national park you hit another junction. You have to take a right here. The main road is where most of the 4×4 tours come back from Laguna Verde directly. So following the main road means you miss Laguna Colorada (and you don’t want to miss that!). If you have doubts, wait until the next 4×4 arrives, stop him and ask for directions. I think the junction is approx. here (S22° 09.125′ W67° 39.732′).

This will bring you to the laguna colorada. Don’t miss the viewing point (S22° 10.222′ W67° 48.279′) and stay a night here. Watch out, the way from the camp to the lookout is best on foot (500m from the camp). The road there is really really sandy. (deep sand).

It is worth it. Going around the laguna is pretty sandy. There is a track right north of the lagoon. I have not checked it out, but it would be worth a try. It would be a lot shorter than around the lagoon. (More info see chapter INFO Laguna Colorada)

The bit around the Laguna is pretty sandy.

The bit around the Laguna is pretty sandy.

After a cold night at the Laguna Colorada the road goes up the mountain. As soon as you have left the laguna the sandy bits are over. No more sand.

Leaving the Laguna Colorada up the mountain.

Leaving the Laguna Colorada up the mountain.

There is the Aduana (S22° 26.454′ W67° 48.357′) but you DO NOT NEED to go there You can do the customs directly at the border since 2014!

There are some geysers (S22° 26.002′ W67° 45.696′) and they are most active in the morning. So 4×4 tours start at 4am. We took it more easy and it was still impressive.

You pass another laguna (Laguna Chelviri) with hot springs. At the hot springs there is a little shop and you will find dozens of 4×4 from organized tours.

Shortly after that on your left hand side there is a fantastic rock formations on complete flat sand. For a reason this is called Disierto Salvador Dali. Its quite nice.

Finally the road leads between the Laguna Verde and the Laguna Blanca. Its a real highlight (S22° 47.292′ W67° 49.067′).

The Laguna Verde. The strong and cold wind stirred up the colourful lagoon.

The Laguna Verde. The strong and cold wind stirred up the colourful lagoon.

The road goes along the south side of the Laguna Blanca and is a bit soft (the road on the north side is a bit better id guess), but no bigger problem. Just take it easy. It is not far to tarmac anymore.

The border is not far away, just up the hill (approx. S22° 52.434′ W67° 47.426′). Not to miss. It is a small building in the middle of nowhere.

The little border crossing to Chile.

The little border crossing to Chile.

The border stuff for Chile you do in San Pedro de Atacama. Here:( S22° 54.666′ W68° 11.615′). BEWARE: you are not allowed to bring any fruits or seeds with you.

We did this route, and I didn’t have the feeling of missing something. I saw enough lagoons, and instead of the Arbol de Piedra we saw fantastic rock formations. But if you want to learn to ride sand you’d certainly should do the route 1.

GPX Tracks:

The tracks are found here:

http://www.wikiloc.com/wikiloc/view.do?id=8390836